Wednesday, November 9, 2011

I pinned it, I did it!

This is a photo heart I created, inspired by none other than my newest obsession... Pinterest. I love having so many photos of my loved ones all together on one wall! Here is the original post, from which I got my idea.


The frame above is just an old frame that I painted and distressed, then put scrap book paper inside. This was a fun and really easy project to create! Photo walls can be done in various shapes. Find some of your favorite photos and this can be the perfect solution to a big blank space on the wall!! <3

Monday, November 7, 2011

Book Wreath - DIY Project

Inspired once again by Pinterest... I found this DIY book wreath tutorial and had to try it for myself! I changed a few things- 1) I purchased foam tubing vs the foam wreath because you can get two wreaths out of one tube, see here. and 2) I hung mine differently. 

Supplies needed:
-Foam Tubing, cut to desired length
-Duct tape (only for taping tubing together)
-Hot glue gun
-LOTS of glue sticks
-Brown paint
-Foam brush/paint brush/paper towel

1. Take your foam tubing and bend it into a circle the desired size of your wreath. I made mine about 10'' in diameter. 


2. Use duct tape and secure the ends together. I suggest using a couple row to make sure it holds. The tubing is going to want to naturally come apart. Tape the connecting ends, and then each side of the tape again just to make it extra secure. (The picture below only shows the one strip of tape.)


3. Gather your book, paint, and brush/paper towel. The paint is going to go along the edge of the pages, this will give your pages an old/burnt look which adds to the overall look of the wreath. I applied the paint directly onto the pages and then brushed along the entire length of the book, until all the pages were covered. If using a paper towel you can just spread the paint along until it is evenly distributed. Allow the book to dry before going to the next step. This shouldn't take long, approx 5-10 minutes. You can use a blow dryer to speed up the process.

(By the way... the book I chose to use is Cecilia Ahern's Where the Rainbow Ends also titled Rosie Dunne.  I already had the book as Rosie Dunne and was gifted this copy by a friend, not realizing it was the same book... otherwise I would not have used it. Cecilia Ahern is the author of P.S. I Love You a great read- much better than the movie!)


4. Once your pages have dried, begin tearing them out, carefully, so that you get the whole page. You will them roll the papers up and start gluing them to the wreath. Be careful during this first row, because if the glue is too hot it will melt the foam tubing. I recommend slightly overlapping each piece. This first row will serve as the bottom/back of the wreath. You will flip it over and work the other direction once this first row is complete. 


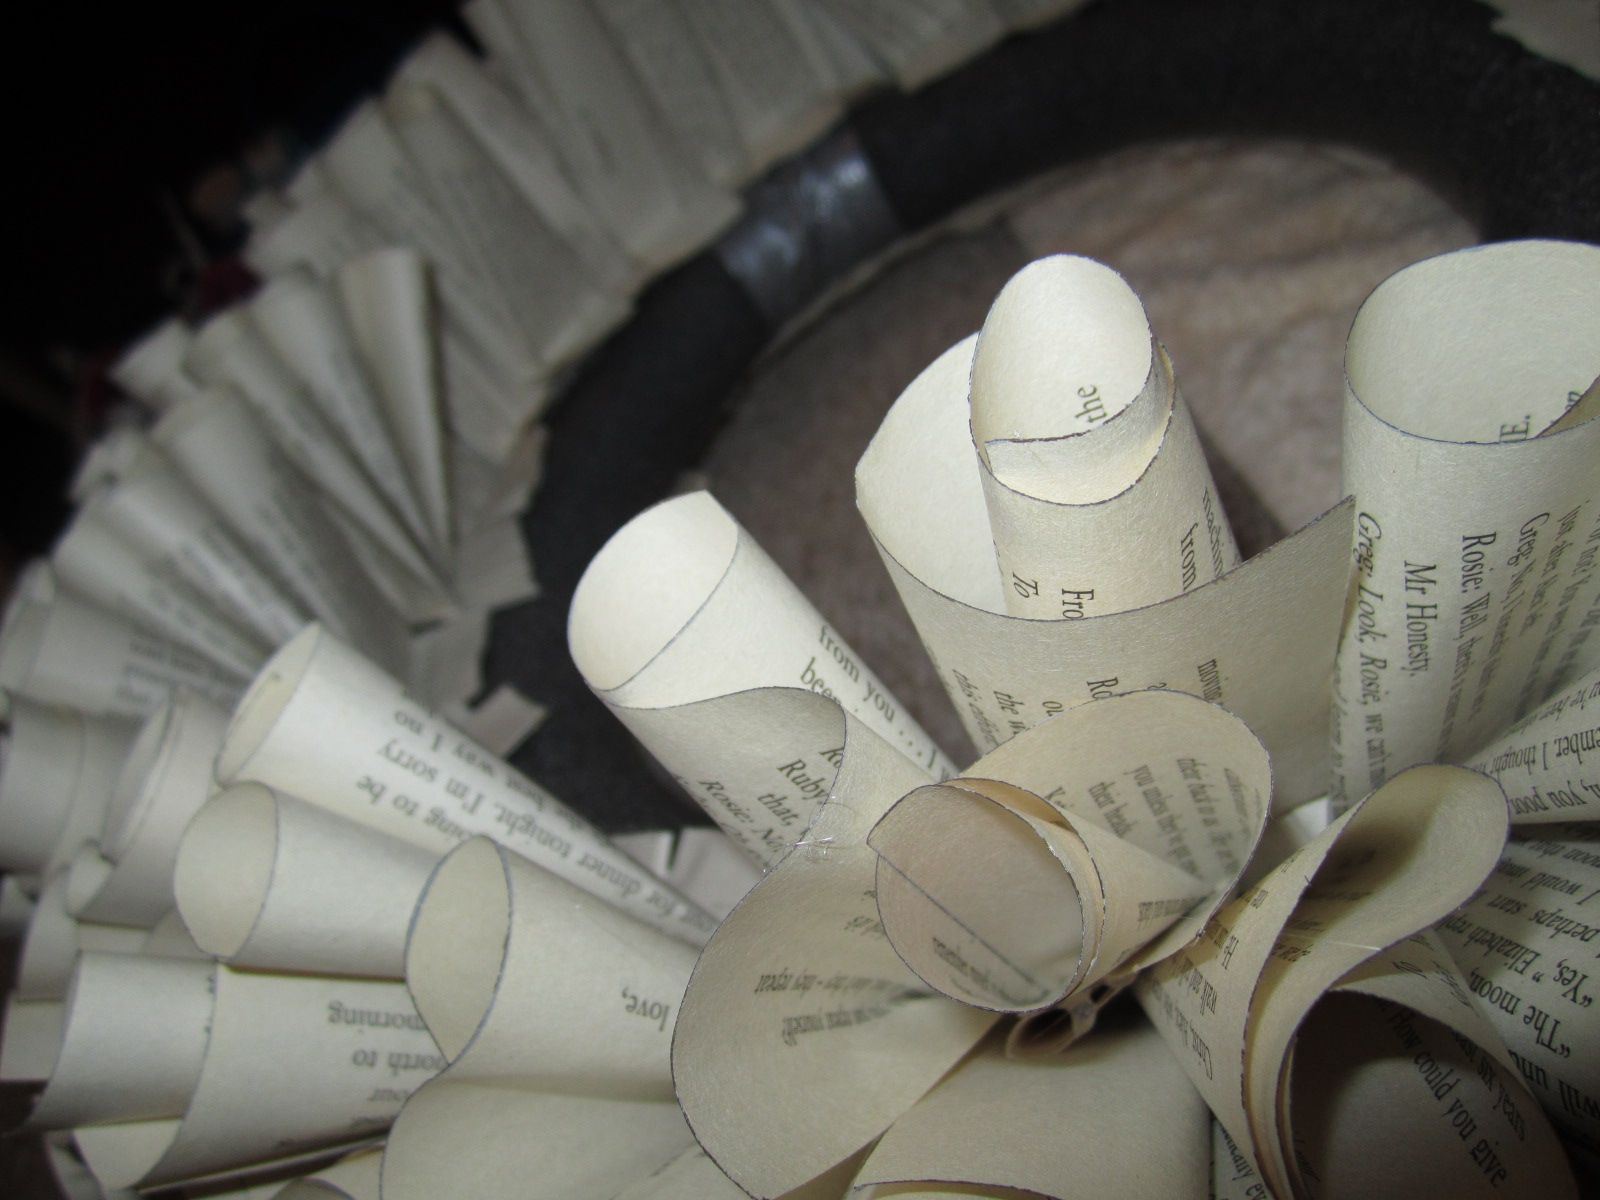
Here are a few ways I rolled the pages. I also doubled up the pages occasionally to give more depth.


5. Once you have completed the bottom row, flip your wreath over and weigh it down with something, so that it will flatten out (I used a box full of paints). Continue gluing, this time bending the pages slightly as  you add them. Continue around and around. If you see gaps, that is ok, you will fill them in later. 


6. As you get closer to the center, you will begin gluing them straight again, as seen below. 


Here is my wreath almost finished... keep adding until you reach the thickness in the center you desire. I also suggest taking pieces and filling in any gaps throughout the wreath. 


Here is the final product. I didn't have enough pages to complete my wreath only using one book, so had to bust out another one... you can tell in this photo the two different paper colors.. but on the wall you really can't because the center has a shadowed effect. 


Here is a picture of it above my desk that I am hoping to refinish. That will be a later DIY project! :)
I used some thin wire and hot glue in order to hang it on a nail. Took a total of about 6 hours, so make sure you have some good TV/movies to watch!! 


Total cost:
$0.97 cents for tubing
$2 for duct tape
~ $1 for glue
= $4 

Hope you enjoyed and hope you are inspired to create some things of your own!! 

Blessings <3 


Fairy Box - DIY Project

This is a little box of fairy treasures that I made as a gift for my goddaughter. I am going to give it to her for Christmas. I was inspired to create this off a post I saw on Pinterest as well as this original blog: http://themamadramalogues.blogspot.com/2010/05/crafty-project-little-fairy-peg-dolls.html. It came out really cute and I can't wait to give it to her! I don't have pictures of everything... but you can get the general idea!

I got all my supplies at Michaels. The box is a small wooden treasure box with a mesh opening in the top so you can see inside the box. It closes with a clasp. I mod-podged scrapbook paper in shades of pink with sparkles to the outside of the box, and lined the inside with the green paper you can see below. I then filled the box with leftover Easter grass. The dolls come as wooden dolls without wings. The wings are wooden dragonflies. I broke off the longer body of the dragon fly and sanded the edge under the wings to make them fit nicely on the backs of the doll bodies. I painted everything using basic craft paints and acrylic spray to finish. I also sprinkled the dolls and their wings with craft glitter while the paint was wet to give them their glowing fairy look :-) The tables are round wooden circles glued to wooden thread spools. The "food" is made up of random beads, glued into painted wooden bowls. This was such a fun project to make!!!! And so inexpensive, considering I had most of the supplies already. 


Here are some of the pieces BEFORE being painted:


Here are some close-ups of the food... this was my favorite part!!!  :-) 


Another favorite thing were the mini-cupcakes I made! :-) These were originally the small wooden mushrooms you saw above! A little paint and glitter and they are transformed into sweet little cupcakes! 


There are TONS of cute little wooden items at the craft store. So if fairies aren't your cup-of-tea, you can create other little worlds for the little ones in your life! I enjoyed this project a lot and the thing I'm looking forward to the most is my goddaughter's reaction. I hope she likes it as much as I do! 

<3 Gracelyn Eirene


Wednesday, November 2, 2011

Florence, Texas 2011

The Vineyard at Florence   |   Florence, TX   |   June 2011 

Took a trip to Florence to tour my friend Alex's vineyard. The vineyard is run by her sister, but she helped her get it going. The vineyard is beautiful and spans a lot of land. I highly recommend taking a trip to this vineyard on a Saturday/Sunday afternoon. They have done an amazing job with it. The young woman that helped us with our tasting knew her wine. She shared helpful information about the distinct added flavors/spices as well as the best food pairings for each wine. Alex took us on a private tour of the vineyard grounds, which offers housing. Gorgeous landscape! My trip to The Vineyard at Florence was a very pleasant experience!

My favorite wine from the tasting - Stella (white)


Nebraska 2011

Johnson Lake, NE  |   May 2011


Mac's Creek Winery and Vineyard   |   Lexington, NE

This was a cute, small vineyard in Lexington - www.macscreekvineyards.com - that I visited with some friends. They make mostly sweet table wines. Not all their wines are sweet, but they ones I preferred were. If you ever find yourself driving through Lextington, NE you should stop and do a tasting! My favorites that I tried were: 

- 2009 Celtic Aire (white)
- 2009 Mac's Lantern (red)
- 2009 Frapple (red/blush)
- Edelweiss* (white)

 *not currently listed on their website


Tuesday, October 25, 2011

San Diego, California 2011

Gorgeous Flowers in San Diego, CA    |    Balboa Park    |    April 2011